How to Create Handmade Artisan Bagels that Will Impress Even the Harshest Critics!
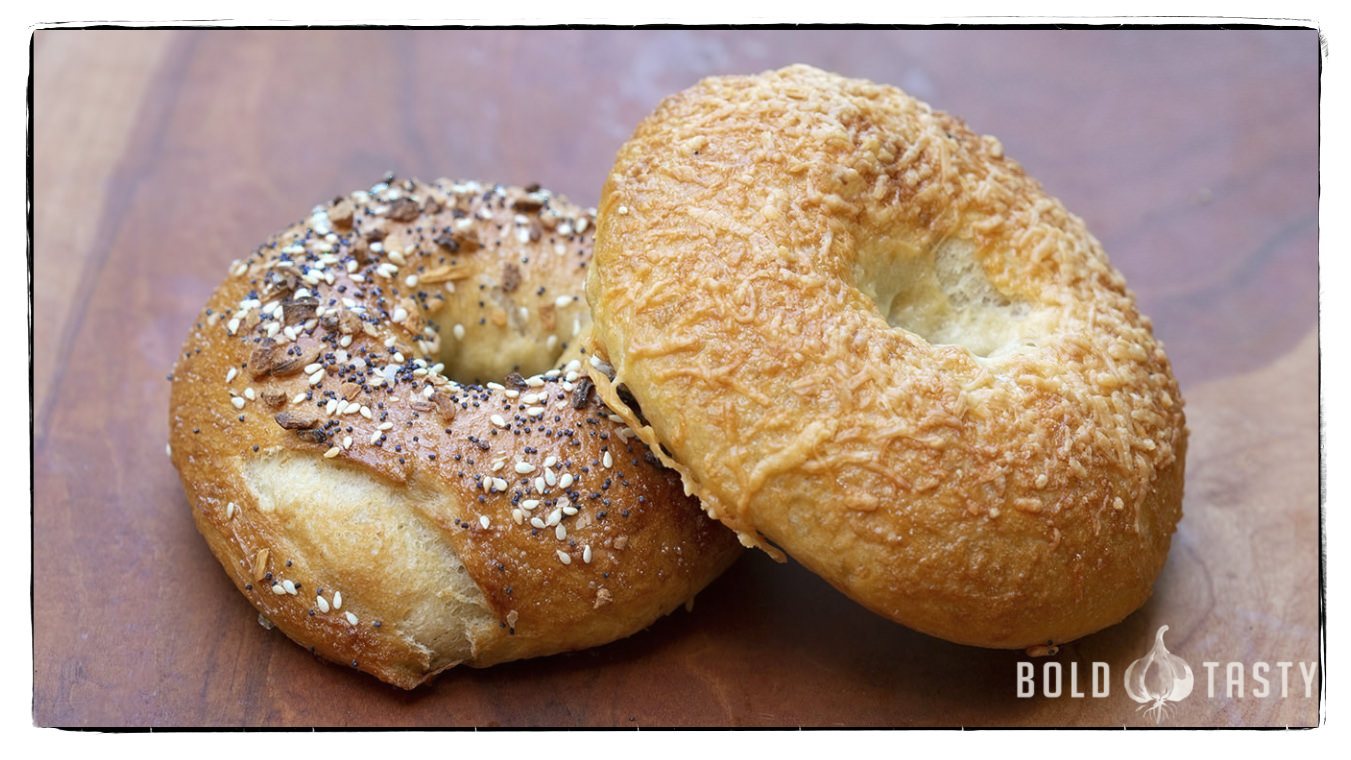
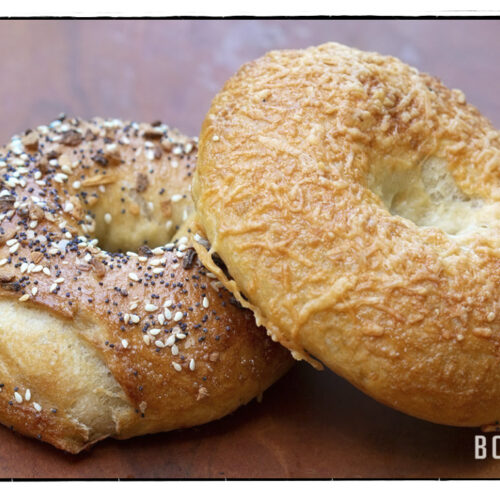
I worked long and hard coming up with a recipe for Artisan bagels. I have eaten bagels just about every day for the last 30 years. If you are looking for a quick and easy recipe, this is not for you. The key to this bagel is the flavor, and it takes time to achieve the taste. I am going to give you the overnight and 48 hour recipe. It really does not take a lot of time, just resting time working its magic in the refrigerator. If you would like a more traditional style, replace the bread flour with all-purpose flour. Above are an everything artisan bagel, and an Asiago artisan bagel. I hope you enjoy the recipe, and feel free to share with friends. This would go great with my egg salad recipes.
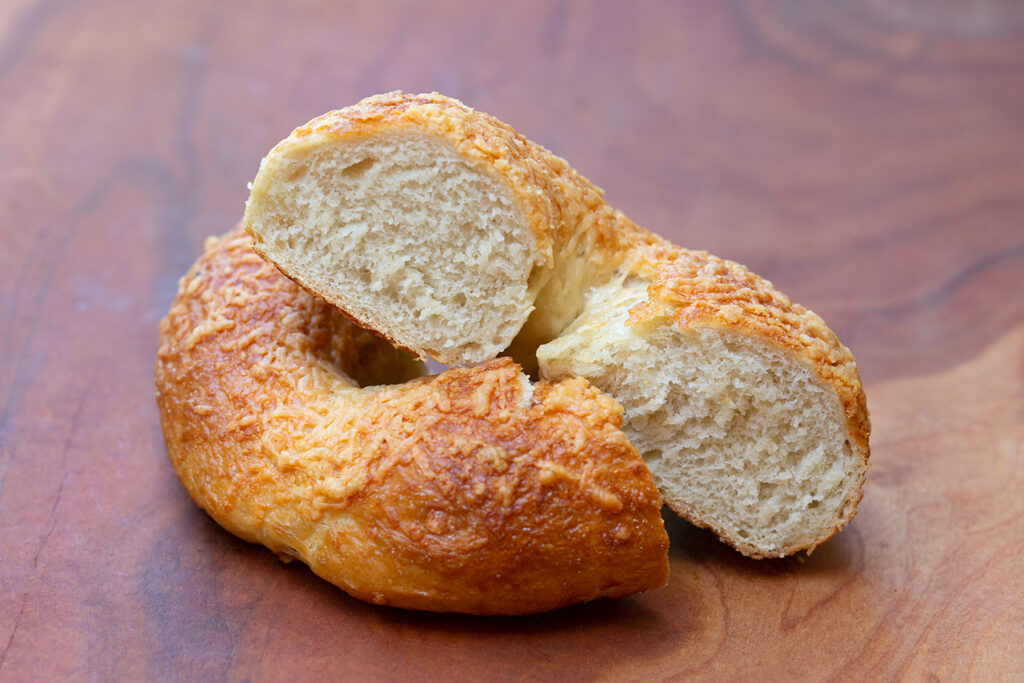
Asiago Cheese Artisan Bagel
The History of the Artisan Bagel: From Tradition to Culinary Craft
Bagels are a beloved food worldwide, but few realize the rich history behind this iconic baked good, especially the artisan bagel—a resurgence of tradition and craftsmanship in modern times. The bagel’s journey spans centuries, cultures, and continents, evolving from a simple bread roll to a gourmet, hand-crafted treat. Let’s dive into the story of the artisan bagel, exploring its origins, rise in popularity, and the artisan revival we see today.
The Origins of the Bagel: A Brief History
The bagel’s story begins in Eastern Europe, with deep roots in the Jewish communities of Poland during the 17th century. Traditionally made from simple ingredients like flour, water, yeast, and salt, the bagel was a practical and symbolic food. Its round, ring-like shape was thought to represent the circle of life, while its dense, chewy texture made it ideal for storage and travel.
Bagels were usually boiled before being baked, a technique that gave them their distinctively shiny, firm crust and chewy interior. Early bagels were often plain or sprinkled with sesame or poppy seeds, making them a staple food among Jewish families and a popular street food.
The Bagel’s Journey to America
Bagels arrived in the United States in the late 19th and early 20th centuries with waves of Jewish immigrants from Eastern Europe. Settling in cities like New York, these immigrants brought their baking traditions with them. Bagels quickly became a part of the cultural fabric of these communities, sold in delis, bakeries, and by street vendors.
In New York City, bagels particularly flourished. The dense, chewy texture of the bagel became synonymous with the city itself, and over time, “New York-style” bagels became a distinct category, renowned for their quality and flavor. The famous bagel-and-lox combination—featuring cream cheese and smoked salmon—became a hallmark of New York’s culinary scene by the mid-20th century.
The Rise of Mass-Produced Bagels
While bagels originally maintained their hand-crafted roots, their growing popularity in America eventually led to mass production in the mid-20th century. Companies like Lender’s Bagels were instrumental in commercializing the bagel, introducing frozen, pre-packaged bagels that could be shipped across the country. This led to the bagel becoming a ubiquitous breakfast item in American households, but often at the cost of traditional baking techniques.
Mass-produced bagels were more convenient but lost some of the signature traits that made the original bagel so special and particularly the chewy texture and flavorful crust created by boiling before baking. Many of these bagels were steam-baked instead, resulting in a softer, fluffier product that lacked the density of an artisan or New York-style bagel.
The Artisan Bagel Revival
In the early 2000s, as part of the broader artisan food movement, the traditional craft of bagel-making experienced a revival. Bakers began to return to the roots of bagel-making, rejecting the mass-produced, often flavorless varieties in favor of hand-rolled, boiled, and carefully baked bagels. These new “artisan bagels” were celebrated for their authenticity, made with simple, high-quality ingredients, much like the bagels of centuries past.
Artisan bagel-makers pride themselves on using traditional techniques, and boiling the bagels before baking, hand-shaping each one, and often fermenting the dough for long periods to enhance flavor. Many also experiment with unique ingredients, offering creative takes on classic flavors while keeping the integrity of the original bagel intact.
Characteristics of an Artisan Bagel
So what sets an artisan bagel apart from its mass-produced counterpart? Here are some key characteristics:
- Handmade: Artisan bagels are typically hand-rolled and shaped, ensuring each bagel has a unique, rustic appearance.
- Boiled, Not Steamed: Traditional bagels are boiled in water (sometimes with a bit of honey or barley malt syrup) before baking, creating that chewy texture and shiny, crisp crust.
- Long Fermentation: Many artisan bakers allow their dough to ferment slowly, often overnight, which enhances the flavor and texture of the bagel.
- High-Quality Ingredients: Artisan bagels often use organic, locally sourced flour and natural toppings, avoiding preservatives and additives found in many mass-produced bagels.
- Creative Flavors: While classics like plain, sesame, and poppy seed remain popular, artisan bagel shops are known for offering unique flavors, from rosemary sea salt to blueberry basil.
Artisan Bagels Today
Today, the artisan bagel is more than just a food; it’s a symbol of the slow food movement and a rejection of the mass-produced, processed foods that have dominated the market for decades. Small bagel shops and bakeries are popping up across the U.S. and around the world, with bakers committed to honoring traditional techniques while pushing the boundaries with new, creative flavors.
In cities like New York, Montreal, Los Angeles, and beyond, artisan bagels are celebrated for their craftsmanship and attention to detail. They’ve become a canvas for culinary innovation, with gourmet toppings, spreads, and sandwich combinations becoming just as important as the bagel itself.
Conclusion: A Delicious Comeback
The history of the artisan bagel is a journey from humble beginnings in Eastern Europe to becoming a symbol of culinary artistry today. While mass production once threatened to erase the traditional methods of bagel-making, the recent artisan revival has restored the bagel to its former glory, proving that quality ingredients and time-honored techniques will always have a place in the world of food.
Whether you prefer a classic plain bagel with cream cheese or something more experimental, the artisan bagel represents the best of both worlds—honoring tradition while embracing modern creativity. It’s a testament to the fact that sometimes, the simplest foods have the richest histories.
Steps to Make Artisan Bagels
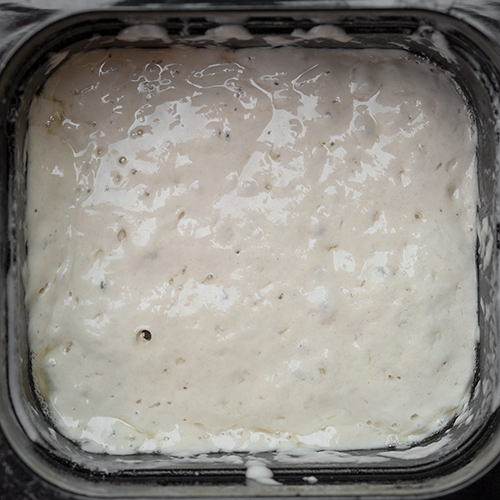
Bagel Poolish
The first step is making a poolish. This will add to the flavor of the bagel dough. It can be used in two hours, but I place it in the refrigerator overnight.
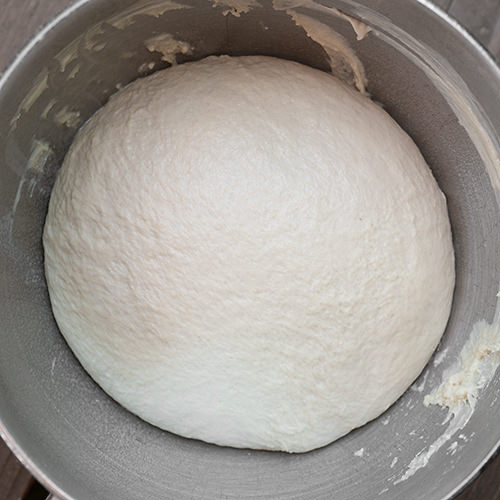
Kneaded Dough
To make the final dough, I combine bread flour, but you can use all purpose flour with the yeast and the poolish. I will cover and let this rise for two hours, and back in the refrigerator.
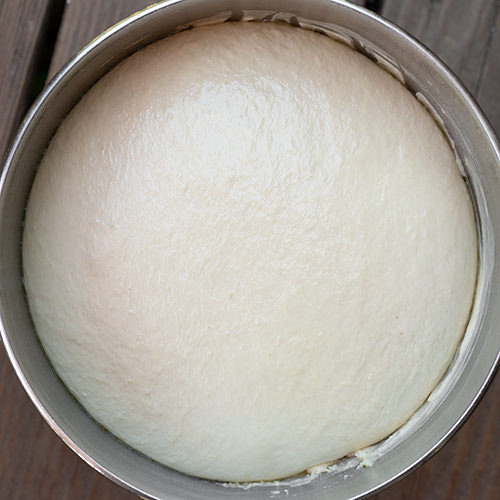
Risen Dough
This is what the dough looks like after it has risen at room temperature for two hours. You could use the dough at this point, but I prefer to stick this in the refrigerator overnight.
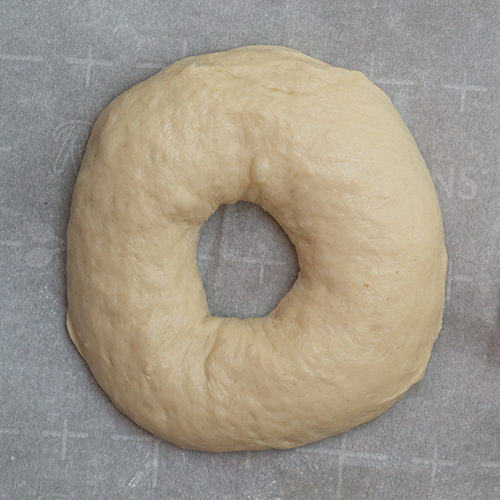
Formed Bagel
The next step is to weigh and form the bagels. I will post two videos below of the both the dough ball forming, and the bagel forming.
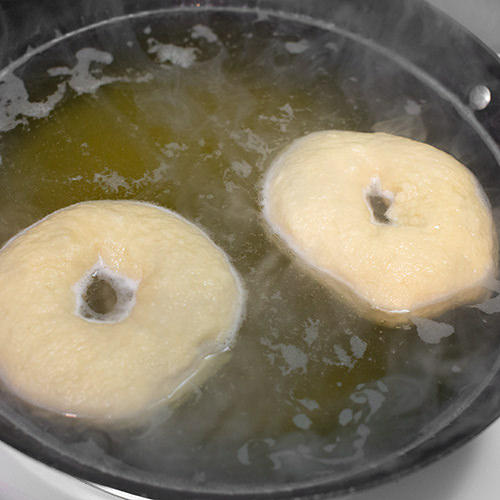
Boiling Bagels
The key to the texture and flavor of a bagel is how long you boil, and in what liquid. I used baking soda and honey. You can use barley malt
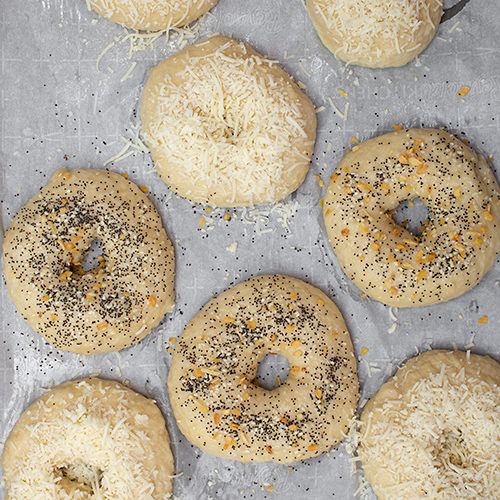
Bagel Toppings
The last step before baking is to apply an egg wash and add the toppings of your choice, or just plain.
Ingredient of the Day-Active dry yeast
Everything You Need to Know About Active Dry Yeast and How to Use It
If you enjoy baking bread or other yeasted goods, you’ve likely come across active dry yeast in recipes. This little ingredient is a staple in many kitchens, essential for making dough rise and creating that perfect texture in breads, pizza crusts, and more. But what exactly is active dry yeast, and how do you use it effectively? Let’s break it down.
What is Active Dry Yeast?
Active dry yeast is a form of baker’s yeast that has been dehydrated to preserve it for long periods. Yeast itself is a type of fungus that consumes sugars in the dough, producing carbon dioxide and alcohol. The carbon dioxide is what causes bread dough to rise and develop the soft, airy structure that we love.
Because active dry yeast is dormant until it’s hydrated, it can be stored for months—sometimes even years—without losing its potency. You’ll typically find it in small packets or jars at the grocery store, and it’s commonly used in recipes calling for yeast-based dough.
How Does Active Dry Yeast Work?
Yeast is a living organism, so it requires the right environment to thrive and do its job. Here’s how it works:
- Hydration: Active dry yeast needs to be dissolved in warm water before being added to the dough mixture. The warmth activates the yeast, allowing it to wake up from its dormant state.
- Fermentation: Once hydrated, the yeast begins to feed on sugars in the dough. This fermentation process produces carbon dioxide gas, which causes the dough to rise.
- Proofing: As the dough rises, it becomes lighter and fluffier. Proofing refers to the resting period that allows the yeast to continue fermenting the dough. The longer you proof the dough (within reason), the more air pockets you create, leading to a lighter texture.
How to Use Active Dry Yeast in Your Baking
While it’s easy to use once you know how, there are a few important steps to follow to ensure your dough rises perfectly. Here’s a step-by-step guide:
- Check the Expiration Date: Before using yeast, make sure it hasn’t expired. Expired yeast might not work, leaving you with dense, unrisen dough.
- Activate the Yeast: Dissolve the yeast in warm water (usually between 105°F and 115°F or 40°C to 46°C) along with a small amount of sugar. The sugar helps jumpstart the yeast’s activity. Let it sit for 5-10 minutes until the mixture becomes frothy and bubbly, indicating the yeast is alive and active.
- Mix with Dry Ingredients: Once the yeast is activated, you can add it to your dry ingredients. Follow the recipe’s instructions on how much yeast to use, as too much can cause over-fermentation, and too little may not give enough lift.
- Knead the Dough: Kneading the dough helps develop gluten, which traps the gas produced by the yeast. This is crucial for creating a well-risen, structured bread.
- Let the Dough Rise (Proof): After kneading, place the dough in a warm, draft-free area to rise. The yeast will continue its work, and you’ll see the dough double in size over time.
- Bake: Once the dough has risen and been shaped as desired, it’s ready for the oven. The yeast will finish its job, giving your baked goods a beautiful rise and perfect texture.
Tips for Success
- Water Temperature: If the water is too hot, it can kill the yeast, and if it’s too cold, the yeast won’t activate. Stick to warm (but not scalding) water.
- Storage: Store unused active dry yeast in an airtight container in the refrigerator. It will last longer and stay more potent than if left at room temperature.
- Test the Yeast: If you’re unsure if your yeast is still good, test it by dissolving a small amount in water with a pinch of sugar. If it becomes frothy within 10 minutes, it’s good to use.
Common Recipes that Use Active Dry Yeast
Active dry yeast is incredibly versatile. Some popular recipes that rely on it include:
- Classic Bread Loaf: Whether it’s white, whole wheat, or sourdough, active dry yeast is key to giving your loaf a perfect rise.
- Pizza Dough: A chewy and airy crust owes its texture to yeast.
- Cinnamon Rolls: The soft, pillowy layers of cinnamon rolls are thanks to yeast dough.
- Pretzels: Yeast helps create the signature chewiness of soft pretzels.
- Dinner Rolls: Light and fluffy dinner rolls benefit from a good rise from active dry yeast.
Conclusion
Active dry yeast is a powerhouse ingredient in the world of baking, turning flour, water, and sugar into light, fluffy, and delicious baked goods. By following a few simple steps, you can easily activate and use yeast in your kitchen to make all kinds of dough-based creations. Just remember to keep your yeast fresh, use the right water temperature, and give it the time it needs to do its job! Happy baking!
Handmade Artisan Bagels
Equipment
- 1 Bowl
- 1 Electric mixer with dough hook or by hand
Ingredients
Poolish
- 400 grams all purpose flour
- 1 tsp active dry yeast
- 500 grams warm water
- 1 tsp barley malt
Bagel Dough
- 1 Poolish above
- 375 grams bread flour, but you could use all purpose
- 30 grams honey
- 17 grams kosher salt
Boil Bagels
- 3 quarts water
- 1 tbsp baking soda
- 1 tbsp honey
Toppings
- 1 egg white
- topping of your choice or plain
Instructions
Poolish
- Add all ingredients in poolish and let rest two hours at room temp or overnight in the refrigerator. I prefer overnight.400 grams all purpose flour, 1 tsp active dry yeast, 500 grams warm water, 1 tsp barley malt
Bagel Dough
- add poolish1 Poolish above
- Add rest of ingredients375 grams bread flour, but you could use all purpose, 30 grams honey, 17 grams kosher salt
- Mix and knead dough for 5-7 minutes. I used a Kitchen Aid Mixer but it can be done by hand.a Kitchen Aid Mixer
- let rest at room temp for 2 hours
- Optional, but I cover the dough and place in refrigerator overnight. Best Flavor
- Weigh Dough and form into balls. 120-160 gram balls.
- Form bagels and place onto lightly greased parchment paper.
Boil Bagels
- preheat oven to 425 degrees
- Boil bagels for 30 seconds per side. I start with bagels face down3 quarts water, 1 tbsp baking soda, 1 tbsp honey
- drain and place back on parchment paper
Topping and Bake
- brush on egg white and top bagels.1 egg white, topping of your choice or plain
- bake at 425 degrees for 20 minutes
- Turn off oven and crack the door and leave bagels in the oven for 10 minutes and crack the door and leave the bagels in the oven
- Cool on wire rack and enjoy!
Video
In recipes, these soy sauces are often used together to achieve a balance of flavor and color.

