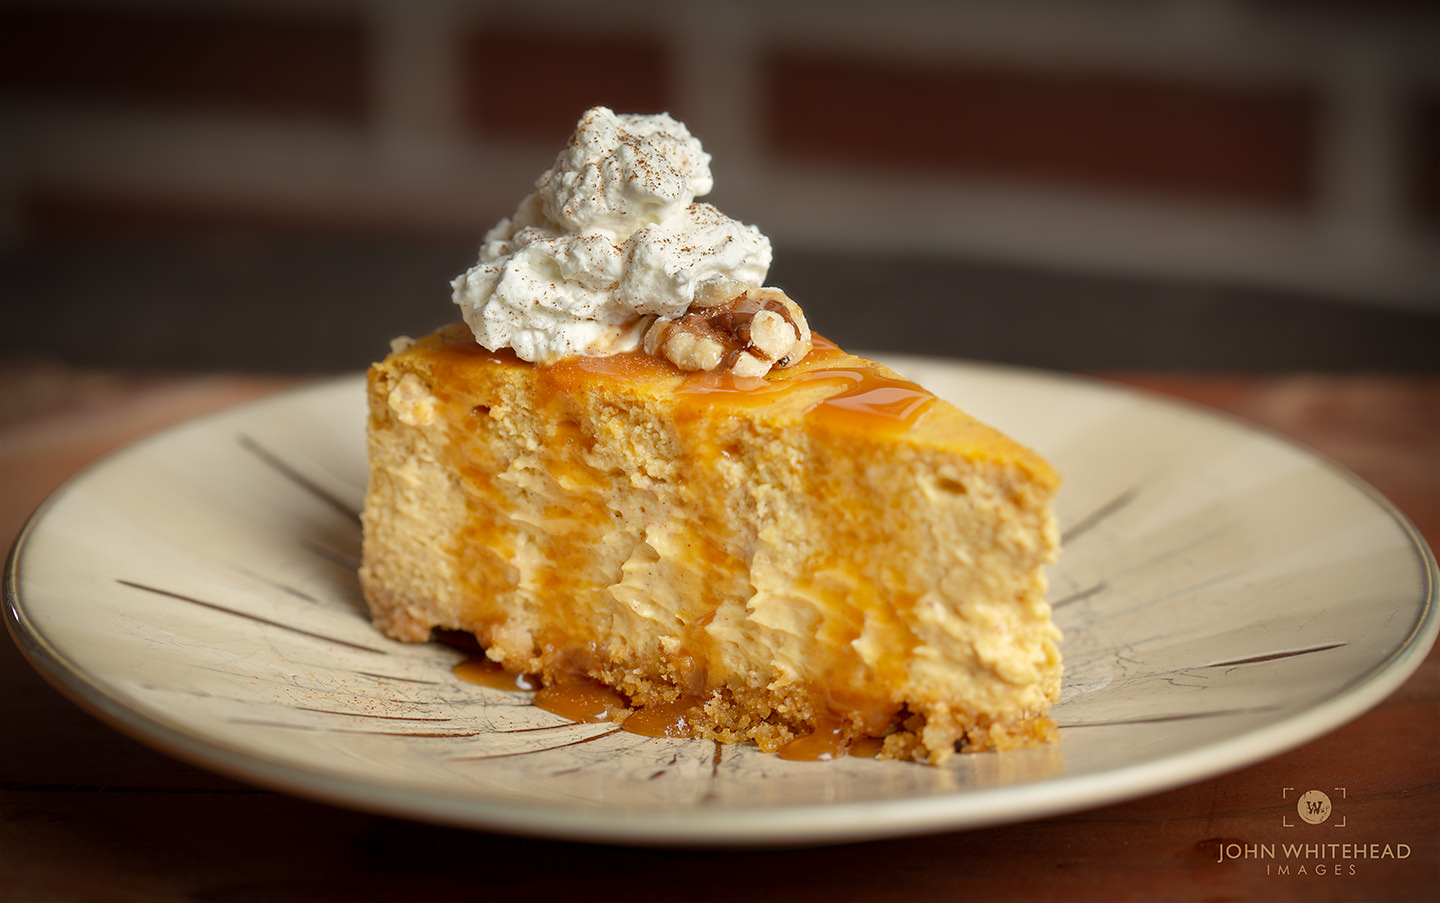
1 Amazing Pumpkin Cheesecake with Nut Crust, Perfect Fall Dessert
How to make this amazing Pumpkin Cheesecake with nut crust. The nut crust is optional, and only partially made of nuts. This version of pumpkin cheesecake is topped with caramel and whipped cream, but I prefer it plain. This is a sweet version of pumpkin cheesecake. I will give you some options in the recipe to cut out some sugar if you would like. Remember, I believe recipes are guides. Everyone’s tastes vary. I do my best to make suggestions in my recipes to help the less experienced baker. Everyone in my household prefers a different variety of every dish. I have perfected the ability to make the same dish three different way quickly.
People believe cheesecake originated in ancient Greece. The Greek poet Cato the Elder, who lived in the 1st century BCE, recorded the earliest cheesecake recipe. This recipe mixed cheese, honey, and wheat flour, then baked it into a cake-like substance. Since then, people have enjoyed cheesecake in various forms around the world, with many different ingredients and variations.
We would love to hear from you. What is your favorite cheesecake? Let us know in the comments below. If you have a pumpkin cheesecake or cheesecake you think is amazing, feel free to submit it with link below.
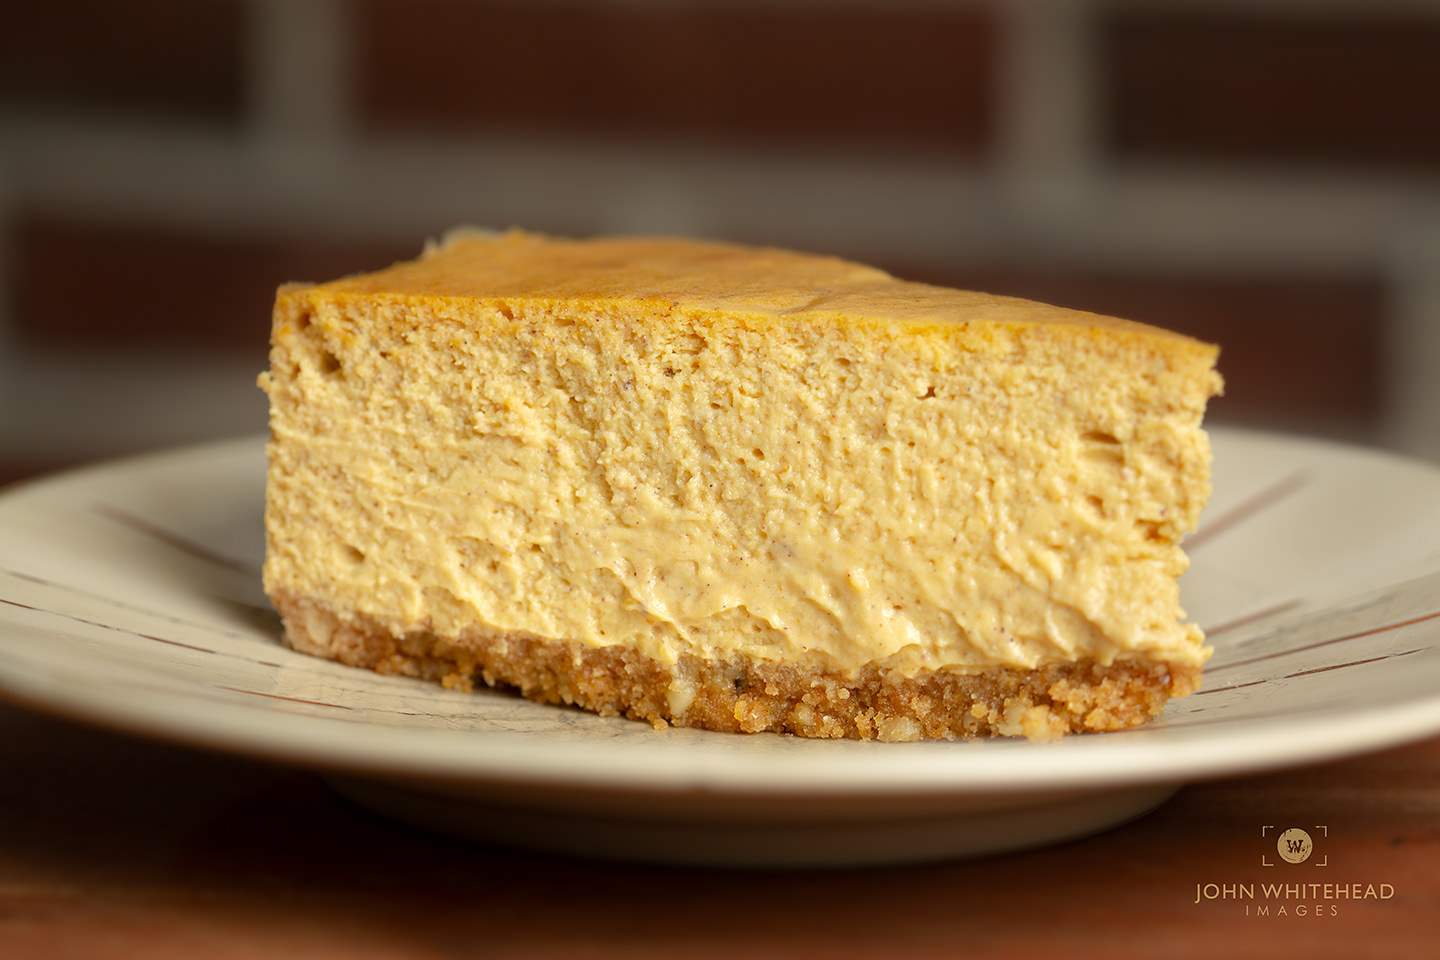
Plain Pumpkin Cheesecake
How to Prevent Cracking
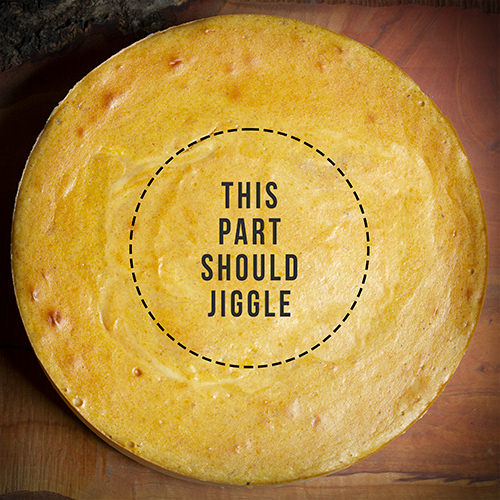
Are you struggling with your cracked cheesecakes? Nobody is perfect, I even had a little 1 inch crack in this pumpkin cheesecake. I find the key is to not fully bake the cheesecake with the oven on. I will usually bake a cheesecake to wear the outside looks firm, but the inside jiggles. See image at left. At that point, I will turn off the oven, but continue cooking with the door cracked 1 inch for 30 minutes. Slowly cool for 2 hours on a cooling rack.
Ingredient of the Day-Cream Cheese
What is Cream Cheese?
Cream cheese is a versatile, soft, and creamy dairy product beloved in kitchens worldwide. With its mild flavor, smooth texture, and rich taste, cream cheese is a culinary chameleon. It’s spreadable and melt-in-your-mouth, making it an essential ingredient in both sweet and savory dishes. But what exactly is it, and how did it become such a staple in so many recipes? Let’s dive into the creamy world of cream cheese!
The Basics of Cream Cheese
Cream cheese is made from milk and cream, giving it its signature richness. The cheese is unaged and fresh, meaning it has a higher moisture content than aged cheeses, which keeps it soft and spreadable. Typically, it has a mild tanginess due to the addition of lactic acid bacteria. The fermentation process is short, just enough to add a subtle sourness and achieve its unique texture.
To legally qualify as cream cheese in the United States, the product must contain at least 33% milkfat and no more than 55% moisture. This high fat content contributes to its creamy texture, making it an indulgent choice for everything from cheesecakes to frostings to savory dips.
A Brief History of Cream Cheese
The origins of cream cheese can be traced back to 1872 in New York, where a dairyman named William Lawrence first accidentally stumbled upon it. Lawrence was attempting to make a French cheese called Neufchâtel but ended up with a product that was richer and creamier. Soon, he began selling it as “cream cheese,” and by the early 1900s, it had become popular across the United States, thanks to companies like the Philadelphia Cream Cheese brand, which is still iconic today.
Flavor Profile and Texture
Cream cheese has a delicate, milky flavor with just a hint of tang. The texture is thick and spreadable but can become light and fluffy when whipped. Its mild taste makes it a wonderful partner for both sweet and savory dishes—it can balance the sweetness in desserts or complement the saltiness in snacks and meals.
How Cream Cheese is Used
- Spread on Bagels and Bread: Perhaps the most popular use of cream cheese is as a spread. Cream cheese on a bagel is an iconic breakfast choice, offering a luxurious start to the day.
- Baking and Cheesecakes: Cream cheese is the star ingredient in classic cheesecakes, adding that rich, dense texture that dessert lovers can’t get enough of. Its tanginess also balances the sweetness of desserts, creating depth in baked goods.
- Frostings: Cream cheese frosting is often used in cakes and cupcakes, especially for flavors like carrot, red velvet, and spice cakes. It’s less sweet than buttercream, adding a hint of acidity that pairs well with sugary baked goods.
- Dips and Spreads: Many dips, such as buffalo chicken dip, spinach dip, and crab dip, use cream cheese as a base to add creaminess and body. It’s a popular ingredient in holiday appetizers and party snacks.
- Savory Dishes: Cream cheese can be incorporated into pasta sauces, soups, and casseroles to add creaminess. It’s also popular in dishes like stuffed chicken breasts, where it melts and adds a rich flavor.
Variations of Cream Cheese
These days, cream cheese is available in numerous varieties. From regular and whipped to reduced-fat and flavored versions, there’s a cream cheese option for almost every palate and recipe. Flavored versions like chive, garlic, and strawberry have become popular, adding an extra layer of taste to whatever you’re making.
Nutritional Value
While cream cheese is delicious, it’s best enjoyed in moderation. It’s high in fat and calories, and though it contains some calcium and vitamin A, it’s relatively low in protein compared to other cheeses. Health-conscious consumers can look for reduced-fat or whipped varieties, which have fewer calories per serving.
Fun Fact: DIY Cream Cheese
You can actually make a version of cream cheese at home! By straining yogurt or curdled milk, you can achieve a spreadable texture similar to cream cheese. This homemade version won’t have the same exact consistency but can still be used in recipes and as a spread.
The Bottom Line
Cream cheese is a delightful ingredient that has earned a permanent spot in pantries and refrigerators worldwide. Its creamy, mildly tangy flavor makes it an incredibly versatile addition to both sweet and savory dishes. Whether you’re enjoying it on a bagel or whipping it into a cheesecake, cream cheese adds that little bit of luxury and indulgence to everyday foods.
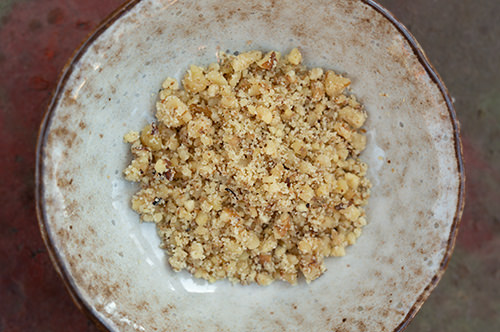
Crushed Nuts
You can replace 1/2 C of graham crackers with crushed pecans or walnuts. I used a mini food processor to crush the nuts.
Press into Pan
You need to firmly press the graham cracker and nut crust into the spring form pan. I used a flat spatula, but anything flat will work.
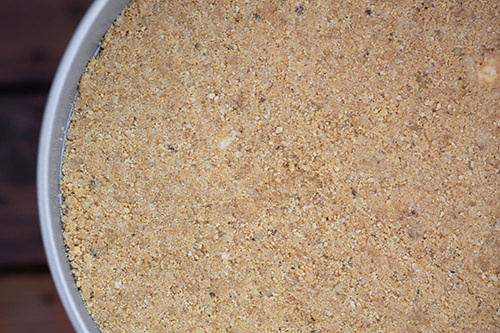
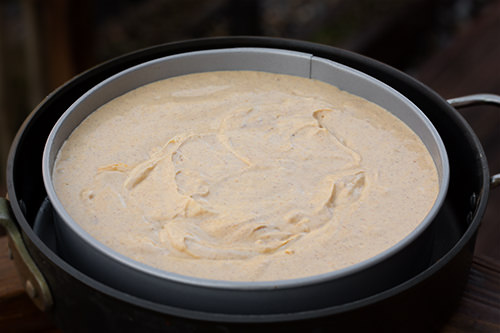
Water Bath
Use a water bath to bake your cheesecake. Anything larger than your spring form pan will work. Fill halfway with boiling water.
Why a Water Bath is Used to Bake Cheesecakes
Baking the perfect cheesecake is an art. A smooth, creamy texture, no cracks on top, and just the right level of firmness are the hallmarks of a well-baked cheesecake. One of the best techniques to achieve this perfection is by using a water bath—also known as a bain-marie. If you’ve ever wondered why a water bath is essential for cheesecakes, read on!
What is a Water Bath?
A water bath involves placing your cheesecake pan inside a larger pan filled with hot water. This larger pan is then placed in the oven, where the water creates a gentle, even heat around the cheesecake. This setup helps bake the cheesecake in a moist environment, and it mimics the low, slow cooking that gives cheesecake its ultra-smooth, custard-like texture.
Why Use a Water Bath?
There are several reasons why using a water bath when baking cheesecakes can make all the difference:
1. Prevents Cracks
Cheesecake is prone to cracking due to the delicate balance of ingredients and moisture. When cheesecakes bake too quickly or at uneven temperatures, they can rise rapidly and then fall as they cool, causing cracks on the surface. The water bath helps prevent this by providing consistent, gentle heat, which allows the cheesecake to set gradually and evenly without sudden shifts in temperature. This prevents the filling from puffing up too much or sinking as it cools, which helps keep the surface smooth and free of cracks.
2. Creates a Creamy, Velvety Texture
One of the key factors in a well-made cheesecake is its texture. When you bake without a water bath, the outer edges of the cheesecake tend to bake faster than the center, resulting in a texture that’s dense on the outside and softer in the middle. The water bath’s moist, even heat allows the cheesecake to bake slowly and uniformly, ensuring a silky, custard-like texture from edge to center.
3. Prevents Overbaking
A cheesecake can be tricky to bake to the perfect consistency. Without a water bath, the edges can cook too quickly, resulting in an overcooked, dry, or crumbly texture. The water bath helps keep the temperature around the cheesecake steady and prevents the outer edges from overheating. This gentler baking method means you’re less likely to end up with an overbaked cheesecake, and you get that soft, melt-in-your-mouth consistency throughout.
4. Adds Moisture
Cheesecake batter is high in dairy and can be prone to drying out, especially during long baking times. The steam from the water bath helps keep the oven’s atmosphere moist, reducing the risk of the cheesecake becoming dry or rubbery. This moisture also gives the cheesecake that luxurious texture that’s firm yet creamy.
How to Set Up a Water Bath for Your Cheesecake
Here’s a quick guide to setting up a water bath for your cheesecake:
- Wrap the Pan: Cheesecake batter is usually baked in a springform pan, which isn’t completely watertight. To prevent water from seeping in, wrap the outside of your springform pan with heavy-duty aluminum foil, sealing it tightly around the edges.
- Place in a Larger Pan: Place your foil-wrapped cheesecake pan inside a larger roasting pan or baking dish.
- Add Hot Water: Carefully pour hot water into the roasting pan until it reaches about halfway up the sides of the cheesecake pan.
- Bake: Place the entire setup in the oven and bake according to your recipe. Keep an eye on the water level, as it can evaporate over longer baking times.
- Remove Carefully: Once the cheesecake is done, remove the entire water bath from the oven. Allow the cheesecake to cool in the pan for a while before removing it from the water bath, then continue cooling the cheesecake on a wire rack.
Troubleshooting Tips
If you’re concerned about water leaking into the pan, consider using a larger cake pan as a barrier rather than foil. Another option is a silicone cheesecake wrap designed for water baths. These wraps are reusable, easy to clean, and provide a water-tight fit around your springform pan.
In Conclusion
Using a water bath may feel like an extra step, but it’s worth the effort for a smooth, crack-free, and velvety cheesecake. It’s the secret behind that melt-in-your-mouth texture that makes cheesecake so irresistible. By providing gentle, even heat and a moist environment, the water bath ensures that your cheesecake bakes to perfection every time. So, next time you’re preparing a cheesecake, don’t skip the water bath—it’s the key to achieving a flawless, indulgent dessert!
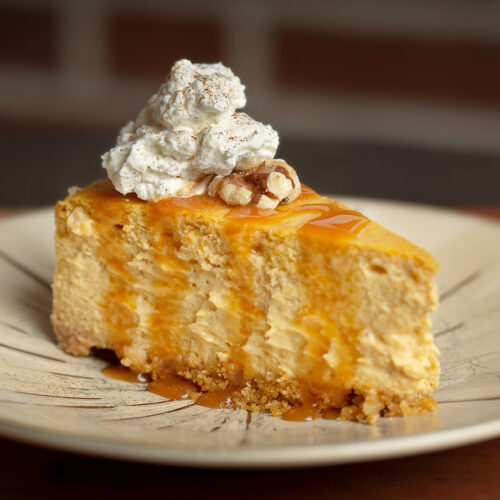
Pumpkin Cheesecake with Nut Crust
Equipment
- 1 10 inch Spring Form Pan 9 inch Spring Form Pan
- 1 Large pan for water bath
- 1 Mixing bowl
- Stand or Hand Mixer
Ingredients
Graham Cracker and Nut Crust
- 1½ Cup Graham Crackers Crushed 165 grams
- ½ Cup Crushed pecans or walnuts 60 grams
- 6 tbsp unsalted butter 84 grams
Pumpkin Cheesecake
- 5 8 oz cream cheese 1134 grams
- 1 Cup sugar or 3/4 C to make less sweet 225 grams
- ⅓ Cup packed light brown sugar 1/4 C to make less sweet 78 grams
- 4 large eggs
- 15 oz pumpkin puree 431 grams
- ⅓ Cup heavy cream
- ¼ Cup sour cream 61 grams
- 2 tbsp ground cinnamon 5 grams
- ½ tsp ground nutmeg 2 grams
- ½ tsp ground ginger 2 grams
- ½ tsp ground allspice 2 grams
Instructions
Crust
- preheat oven to 350 degrees1½ Cup Graham Crackers Crushed
- mix graham crackers, nuts, and butter into bowl (use 1/2 Cup more graham cracker if you do not use nuts½ Cup Crushed pecans or walnuts, 6 tbsp unsalted butter
- lightly spray 10 inch spring form pan with oil
- press graham and nut mixture into bottom of pan. I used a large flat spatula
- bake at 350 ℉ for 7 minutes
- let cool before adding cheesecake mixture
Pumpkin Cheesecake
- Boil water for water for the water bath
- Whip cream cheese, sugar until light and fluffy5 8 oz cream cheese, 1 Cup sugar or 3/4 C to make less sweet, ⅓ Cup packed light brown sugar 1/4 C to make less sweet
- add pumpkin puree and mix15 oz pumpkin puree
- add heavy cream, sour cream, vanilla and spices and mix⅓ Cup heavy cream, ¼ Cup sour cream, 2 tbsp ground cinnamon, ½ tsp ground nutmeg, ½ tsp ground ginger, ½ tsp ground allspice
- add eggs and mix until just combined4 large eggs
- Add mixture to cool spring form pan
- add spring form pan to water bath and cover spring form pan 1/2 way with boiling water
- bake at 350 ℉ for 70 minutes
- turn off oven, crack the oven door 1 inch and cook for 30 minutes
- let cool for 2 hours
- slice and serve for warm and fluffy, otherwise chill for 30 minutes after cooling. I topped with caramel and real whip cream.

LET ME KNOW WHAT YOU THINK!